Monday, February 28, 2011

Dog Gone Fun - Toy tutorial and Beefy biscuit recipe

I'll admit I'm dog crazy, can't imagine my days without four paws by my side.


Just before the holidays we bid a teary goodbye to our ten year old wheaten terrier, Maizy. She was my faithful companion and an expert nanny dog. She was the inspiration behind my second book, Pet Crafts. She left us far too young but will be treasured in family memories.


We picked up Otto at the begining of the new year. He's a spring loaded mini aussie whose filling our days with love and laughter. Our five year old daughter is having a great time helping with all things puppy from training to bathing.


Puppy toys and upscale treats can be pricey, you'll be amazed how easy and inexpensive it is to make and bake your own. Over winter break Celia devoted an hour making Otto a crazy furry critter. 


He immediately pounced on the crackling body and attacked the squeaky tail. This unique toy features a long Velcro body opening so that you can replace the crinkly water bottle stuffing.


You'll need the following supplies: fun fur and felt scraps,
fiber fill stuffing,
sew-on hook and loop fastener 
a squeaker , you can recycle one from an old toy or order them online.

Fold the tail fur in half and cut through both layers to make a pointed tail shape that is  12" long, 5" at it's widest halfway down the tail, and 3.5" wide at the base. Cut the body fur into a 11" wide x 12" long rectangle; which should be wide enough to wrap around a large sized water bottle. Then cut a circle that is 4" in diameter for the head. Finally cut two pairs of 1.5" high and 1.5" wide felt ears, a 1.5" wide nose, and two .75" circle eyes.


Place the right sides of the tail together and machine stitch around the outside edge, be sure to leave the base unsewn. Make a second reinforcing seam. Snip off the very tip of the tail and turn the fabric right side out.


Lightly fill the tail with stuffing, then insert the squeaker.


Stack the ears together and stitch around the outside edge leaving the base unsewn, then turn them right side out. Position the eyes and nose in the center of head and spiral stitch them in place. Place the ears point sides down over the face and stitch them to the edge of the head.


Placing right sides together stitch the bottom edge of the body rectangle to the head. The body piece should overlap by an inch and half to enable the loop and closure to work.


Reach inside and turn over a half an inch of the cut fabric edge down the length of the body. Machine stitch a single seam to finish the folded edge.


Insert the tail into the base of the critter. Make sure that the unfinished body edge overlaps the finished one. Stitch through all the layers to close the base and attach the tail.


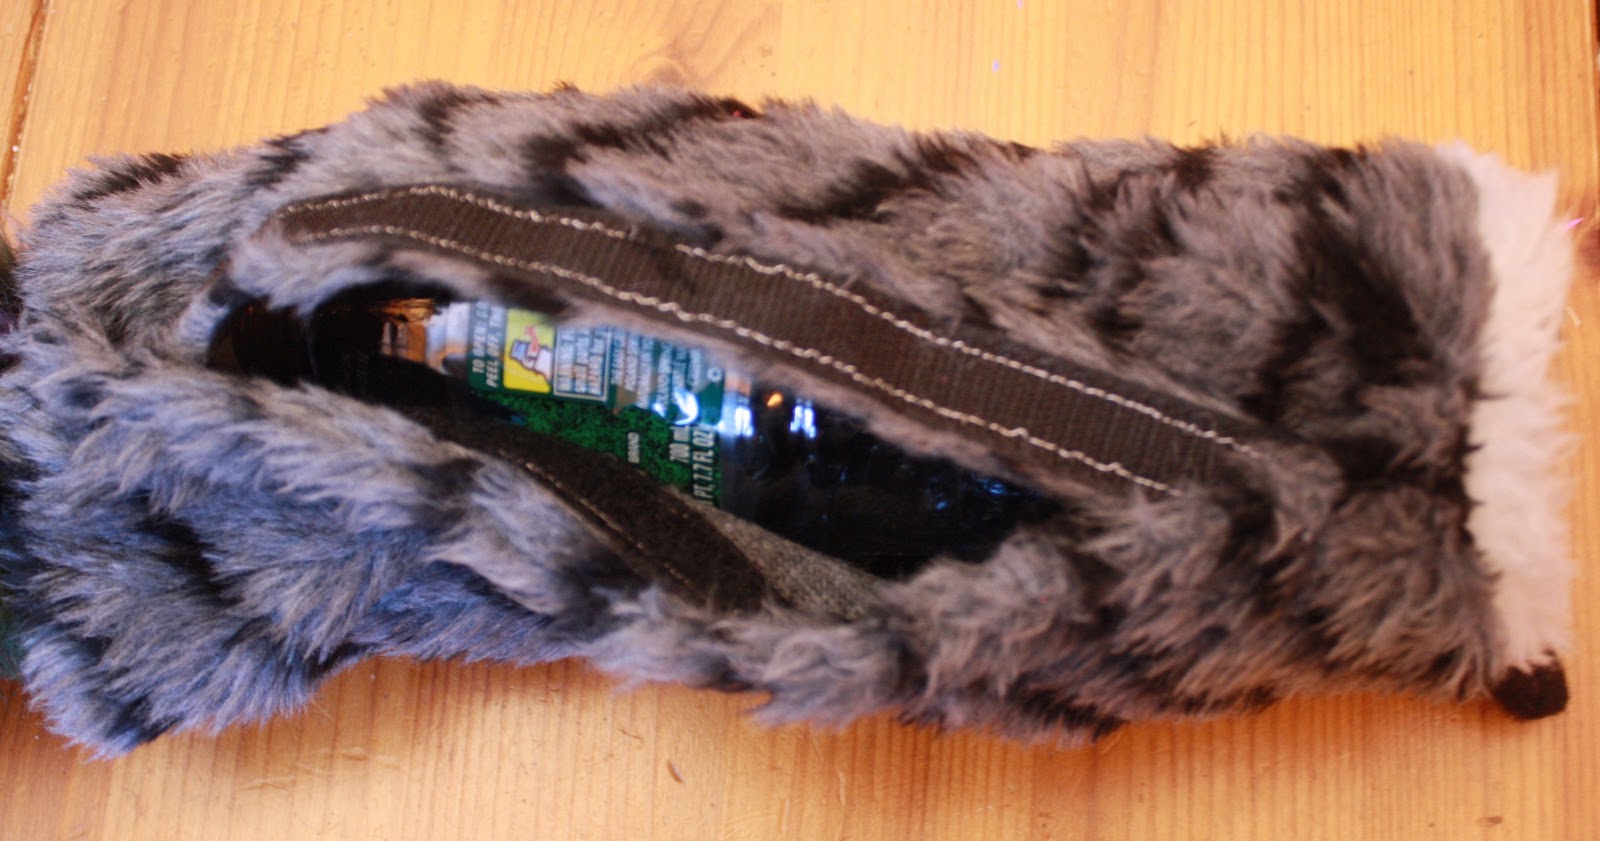
Turn the critter right side out. Pin and sew 10.5" length of hook and loop closure to the top of the unfinished edge and the underside of the finished edge. Insert the the bottle and let the games begin! A word of caution please be aware of your animals chewing habits and do not leave them unsupervised while they play.


When your pup slows down for a snack here's a biscuit recipe that will make them sit and beg.


Beefy Dog Biscuits

Preheat the oven to 300 degrees

In a large bowl/or stand mixer combine: 1/4 cup instant milk powder 
 1 T garlic Powder
1/2 cup cornmeal
1/2 cup wheat germ
1 cup oatmeal
2 1/2 cups flour

In a pryex measuring cup:  Dissolve two beef bouillon cubes in 1 1/2 cups of boiling water
Add 1 T of Peanut butter and drizzled in some honey.

Pour the wet ingredients into the dry ingredients and mix well.  Roll the dough to a 1/4" - 1/2" thickness on a floured work surface. We use a snowflake or flower shaped cookie cutter so that we can break off small pieces for training or stuffing into Kongs. Bake for 45 mins. then turn off the heat and leave the cookies to cool and harden in the oven for 10 hrs. Store in an airtight container. This recipe makes a generous cookie supply that lasts us almost a month.

Wednesday, February 9, 2011

Tweet Sachet tutorial


The woods surrounding our Maine home are covered in a dense quilt of snow. The early mornings are especially quiet, if it wasn't for the sounds of the woodpeckers and chickadees I'd be convinced that the whole world was sleeping. The last few morning robins have covered our crab apple tree filling their bellies with fruit. I'm hoping these red breasted birds are a harbinger of warmer temperatures and birdsong to come.


Just after the holidays a local patron had asked me to make a couple of the bird sachets that I had stocked over the holiday fair season. She was willing to wait until I'd wrapped up the copy and illustrations for my latest book 'Stitched Whimsy'. I finally delivered the finished sachets this morning, just in time for her to mail them as Valentine gifts. I took photographs while I made them so I could share the instructions with you.


You'll need scraps of muslin and cotton. Use a cutting mat, clear rule and rotary cutter to cut a 7 1/4" x 4 3/4" rectangle of muslin for the front and the same sized printed cotton for the back. While you're set up go ahead and cut multiples. When you're in stamping mode you'll be happy to have a stack of muslin ready for printing.


Cover your work surface and mix up Simple Spray (Duncan) fabric paint with brown acrylic paint. I find the loose liquid of the simple spray dilutes acrylic and helps the fabric absorb the paint. Brush the mixed paint onto the fabric stamp. I purchased this gorgeous hand carved wood stamp from Nest, its a fair trade product that is also available online at Connected. Match your brushstrokes to the form of the stamp. I started at the head and worked my way down the body increasing the length of the stroke on the wings and tail.


I found that laying the fabric over the painted stamp works better than conventional stamping. Rub your fingers over the entire surface of the fabric covered stamp. If you prefer to press the stamp down onto the fabric, layer a folded old towel under the muslin. The padding will allow you to press down on the stamp and push more paint into the muslin. 


Allow the printed fabric to dry before continuing.


Placing right sides together pin the printed muslin to the printed fabric backing.


Align the outside edge with your presser foot and machine stitch around the outside of the sachet. Leave a one inch opening to turn the sachet right side out.


Trim away any excess fabric and clip the corners.


Turn  the sachet right side out, using a stuffing stick or knitting needle to push out the corners. 


Pour a cup of dried herbs into the opening. I used a 1/2 cup each of Balsam and Lavender over the holidays. I filled this new batch sachets with a cup of lavender. It's time for me to place a new order at San Fransisco Herb Co. and experiment with spring and summer scents. Tuck the raw edges of the opening into the sachet so it matches the seamed edges on either side. Instead of hand stitching the opening closed I machine stitch a second top stitched seam around the edge of the stuffed sachet. The opening will be stitched closed in this seam.


Hand stitch cut felt leaves and wooden beads by the foot of the bird. You'll be happy that you cut and stamped extra birds, this sweet sachet makes a great gift. It's too pretty to hide in a drawer enjoy it out in the open until spring arrives. If you're not in the mood to whip a sewing project I'll be stocking these sachets in my brand new Etsy Store.
Related Posts with Thumbnails