

It's back to school time! Once you've picked out your wardrobe, it's time to get crafty and make coordinating hair accessories. If you stash fabric or are holding onto small scraps this project is just for you. Making fabric covered buttons is a cinch, if you haven't tried it before follow these easy steps. It's a great crafty trick to have up sleeve.

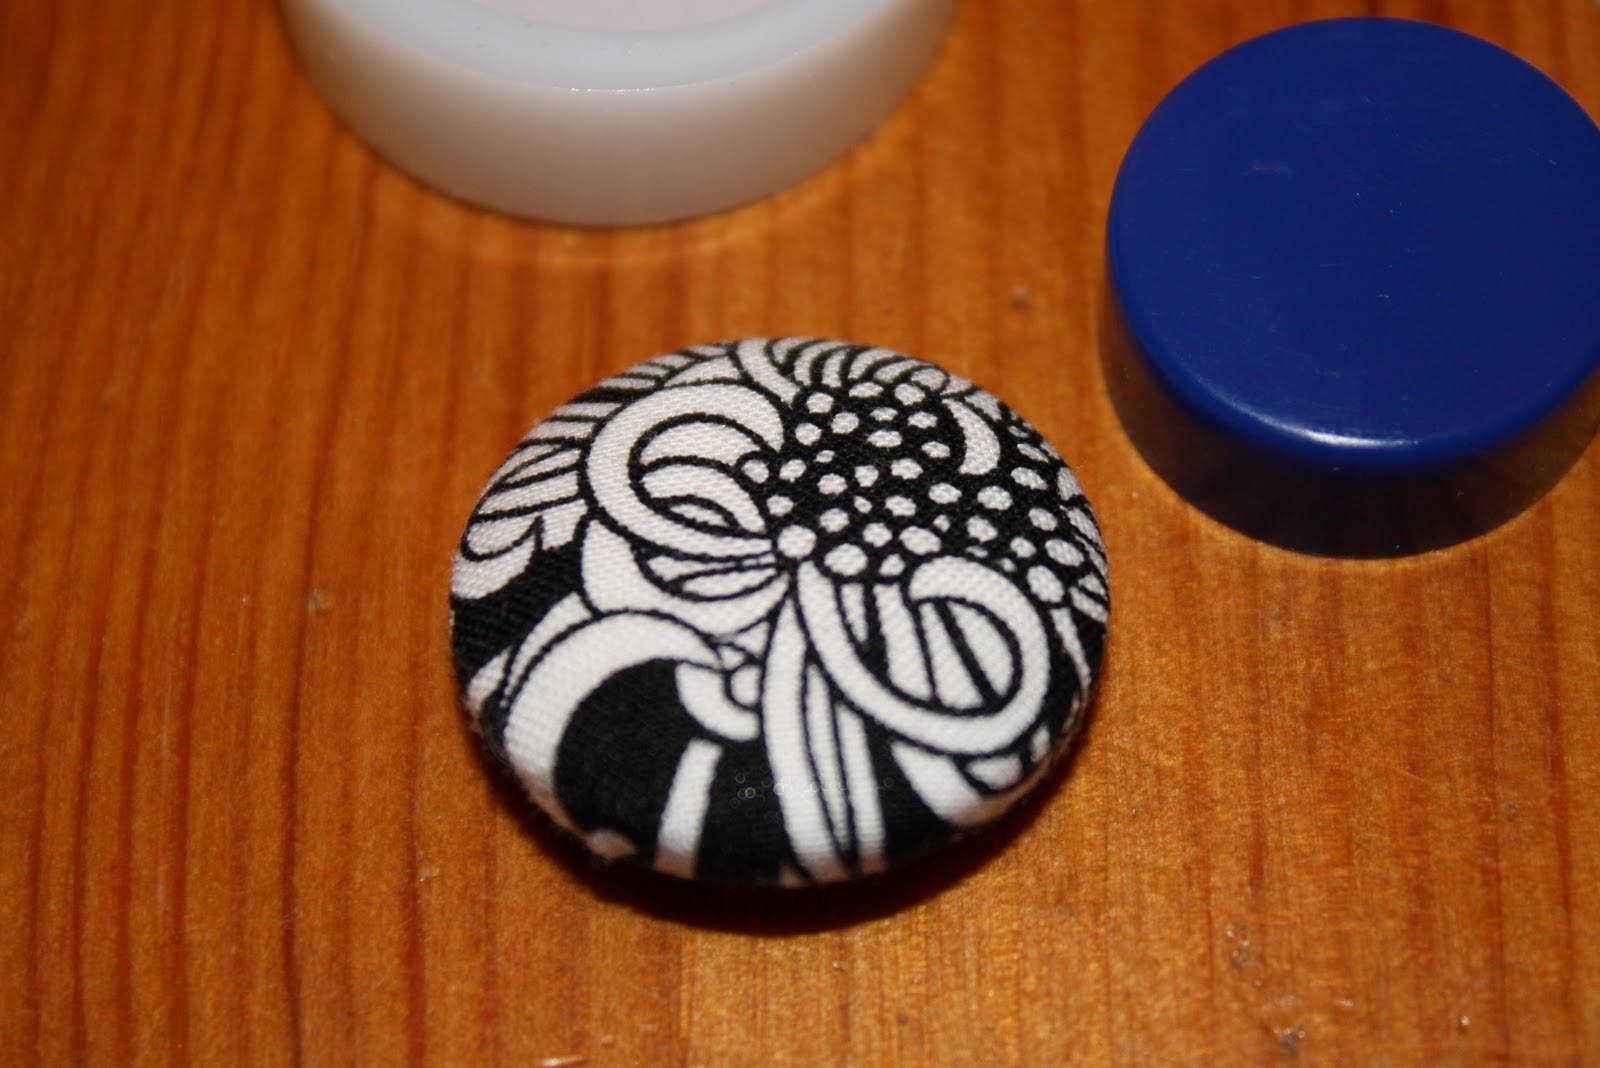
Purchase the desired sized button covers and tool kit at your local sewing store. I used 11/8" covers which are too large for toddlers and preschoolers but are perfect for school aged kids and adults. The kit comes with two plastic pieces, a white base and dark blue insert. You'll also need: fabric, thin hair elastics, chain nose pliers and scissors.

Use the template on the package to cut out a circle of fabric. Make sure the center of the circle features the portion of the fabric design that you want to appear in the center of the button.

Place the fabric right side down into the white plastic base.

Position the button back rounded portion down over the fabric and press it down into the base.

Curl the fabric edges down into the curved button. Place the wired button back down over the fabric covered base.

Push the dark blue piece down over the button cover and press down until you hear the top and bottom pieces snap together.

Remove the finished button from the white plastic base.
Flip the button over wrong side up on your work surface. Grab the wire shank with the chain nose pliers and push down against the button back to widen the shank. Pull the elastic halfway through the modified shank. Loop one end of the elastic through the other and pull tight.

There's no end of possible button sizes fabric and elastic combinations, have fun!

While I've been booking Holiday Craft Fair dates I've been brainstorming ways to keep inventory throughout the season. This bright and colorful ponytail project is easy on the hands and should be popular stocking stuffers. I just placed a bulk order for button blanks.... maybe I'll have to go fabric shopping to find some irresistible smaller print fabrics.
These are so fun! I've been saving up certain fabric remnants to make some for my girls that have fun little animals on them - so I can make some of these. I'm also going to make them some fabric covered thumb tacks for their bulletin board!
ReplyDeletenice
ReplyDeleteFantastic beat ! I wish to apprentice while you amend your site,
ReplyDeletehow can i subscribe for a blog site? The account helped
me a appropriate deal. I have been a little bit acquainted of this
your broadcast provided vivid clear concept
Also visit my page :: travel
Yes! Finally something about weather.
ReplyDeletemy weblog :: vakantiehuisjes frankrijk huren **
My spouse and I absolutely love your blog and find most of your
ReplyDeletepost's to be precisely what I'm looking for. Does one offer
guest writers to write content for yourself? I wouldn't mind writing a post or elaborating on some of the subjects you write regarding here. Again, awesome website!
my blog: vakantiehuis frankrijk ()
Heya i am for the first time here. I came across this board and I find It really useful & it helped me out much.
ReplyDeleteI hope to give something back and aid others like you aided
me.
My site: vakantiehuisje frankrijk (vakantiehuisjefrankrijklastminute.webspawner.com)
I couldn't refrain from commenting. Well written!
ReplyDeleteAlso visit my blog post particuliere vakantiehuizen ()
It's really an informative and well described post. I appreciate your topic for blogging. Thanks for sharing such a useful post.
ReplyDelete