 |
| This crafter doesn't need glitter to shine. |
 |
| Hope it passed the test! |
I started the event with the perfect book The Snow Globe Family, by Jane O'Connor. It was my first time being miked for a library event, it worked well until I moved around for the room for the demo and unwillingly broadcasted ear piercing screeches.
 |
| Jane O'connors book about life inside a snow globe is a classic. |
Most snow globe projects require a strong adhesive to attach a plastic object to the inside of the lid. This presents two problems, the library budget can't afford 80 plastic objects and children don't want to wait a day for the glue to dry before filling their globes with glitter and water.
 |
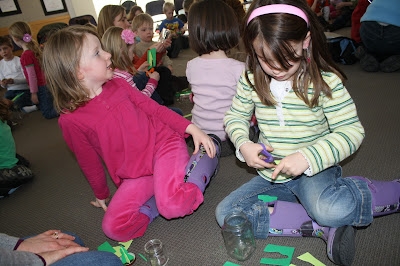
| Crafting with a crowd is exciting inspiring and also distracting! |
I decided craft foam would be the perfect alternative, it's waterproof and easy for kids to cut. My best discovery was permanent Glue Dots, quick to distribute, mess free, and best of all they instantly held craft foam in place!
 |
| A creative participant added a wonderful polar bear to the scene |
We supplied the children with two shades of green foam and scissors. I demonstrated how to cut out two tree shapes (that would fit inside your jar). Then I cut a slit halfway down the middle of one tree and halfway up the middle of the other tree. Slide the two pieces together and you instantly have a three dimensional tree.
 |
| Test fit your tree before filling the jar, it's easy to give your tree a haircut if it's too tall or wide. |
I had them place a glue dots inside the lid and press the base of the tree into the glue. Only a couple of trees sprang loose, to prevent this I'd suggest anchoring the sides of the trees with 1-2 additional dots.
 | |
| Initially the glitter floats on the top, once you screw on the lid and give it a shake the glitter is set into motion. |
The favorite step was adding a spoonfuls of iridescent and light blue glitter. For a true snowy appearance I would recommend opaque white glitter. Glitter is the one ingredient that I should have double stocked, it's impossible to have too much!
Parents (and my two high school helpers) applied a bead of Silicon Aquarium Sealant (sold at pet stores) to the inside edge of the metal lid before screwing it in place. If you're making the project at home with the kids you could easily substitute a glass and metal glue.
We also provided white craft foam strips to wrap around the base of the jar. This covered the lids and gave the illusion of a snow bank. Glue dots were used to attach the overlapped ends.
 |
| No doubt about it, kinetic crafting is a hit! |
I'll always wonder if our combined enthusiasm for snow ushered the ten inch storm that fell the next day. I'm already looking forward to planning a warmer craft for April break, maybe we can get flowers to bloom!
 |
| Isn't everything better with a bow on top? |


No comments:
Post a Comment