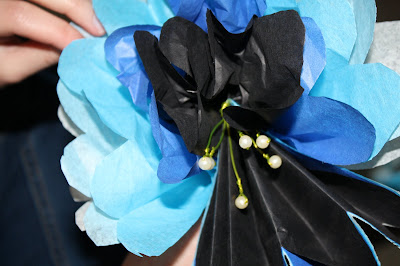
Summers officially here and I'm thrilled to be spending my Friday afternoons running the DIY- Make it here, take it there, teen program at our local library.
Last week was our first Friday and I was happy to see familiar faces from last year (a couple of whom are now college kids) along with newcomers. This tissue paper flower project was a huge success, easy enough that everyone felt confident and dove right in.
Before you pull out the tissue paper the first step is it twist plastic beads onto either end of three - 4" wire lengths.
I used the Toner Fun wire I had on hand, you could easily substitute a lightweight 22 or 24 gauge floral wire. Be sure to save your scissors and use wire cutters to cut the wire lengths. When you fold the three wires in half they'll create a six bead flower center. Set them aside until you're ready to assemble the flower.
Tissue usually paper comes in 24" x 36" inch sheets. Stack four different colored sheets together, fold them in half and then in half again. This will give you four sets of quarter sized sheets. Each flower takes a single stack of four sheets. I pre-cut the tissue paper but encouraged the teens to mix and match the sheets to create their own color combinations. Starting on the narrow edge, fold up the bottom edge and then accordion fold the remaining length. It's just like making a fan, back and forth, creasing each new fold line.
Fold down the top inch and half of a 20 gauge fabric covered floral stem and then trap the centers of the three wire stamens and the folded paper in the bent wire. Twist the wire end around itself under the paper. If the paper is loose enough to wiggle free, twist it a couple more time to tighten the loop.
Twist the base of the wire stamens a couple times so that they stand erect. The next step is to select what shape to cut on either end of the fan. Each of the following three cuts create a different shaped petal and flower. Making one and half inch slits into spaced a quarter inch apart will create pompom carnation like flowers.
Making a v shape will yield a pointed lily petals.
A rounded n shaped end will produce a standard rounded petal.
Once you've cut your petal shape, gently spread open either side of the fan.
Starting in the middle closest to the stamens, pull one layer of petals up to the center of the flower. Slowly bring each tissue paper layer up behind the layer before it.
Once you've separated the tissue paper petals on one side repeat the process with the other side
Here's a lily that is blooming with color!
I loved watching the tables filling up with colorful blooms! Don't hesitate to try this with younger children or even adults. It's a great project to liven up a rainy summer day.


Heidi, klick open Leena Lumi's Flower Power. Try it!
ReplyDelete