Showing posts with label Portland Fiber Company. Show all posts

Monday, March 14, 2011

Hedgehogs: Needle Felting Tutorial


Last Friday I had the pleasure of crafting with some great teens. Needle felting is a simple accessible craft, if you can poke a needle you can needle felt. Only two of the participants were experienced needle-felters but everyone was very successful.


Hedgehogs are surprisingly popular in our northern porcupine country. Their shape makes them the perfect beginner project. I've been needle-felting lots of critters for my new book project Stitched Whimsy.  In the process I've realized the importance of chenille skeletons that form a sturdy flexibility core under the wool roving. In this case the wire allows you to raise and lower the hedgie's nose. The first step is to fold the chenille stem in half and trap a thin pinch of roving in the fold. I use inexpensive wool mill scraps for the foundation of all my felted creations.


Form the chenille stem ends into two loops, twist the wire ends around the base of the loops. Interlock the two loops together to create a framework for the body.


Tightly wrap the roving around the folded chenille stem to create the nose and head. Working over a foam matt or section of rigid foam insulation poke the roving on all sides with a felting needle. A felting needle has tiny barbs that catch the individual wool fibers and knit them together, the more you poke the more the fibers are compressed.


Fill the chenille frame with roving and then over wrap the body with additional base roving. Needle-felt the roving on all sides to compress the fibers and solidify the body.


Cover the base color with brown roving, switch directions as if you were winding a skein of yarn. The combination of overwrapping and needle felting will tighten the body. Wrap the head and nose in beige roving and needle-felt in place.


Roll tiny pinches of colored roving to make the eyes and nose. Needle felt these small pieces directly into the beige head. Spiral slightly larger pinches of beige roving and needle-felt them on the matt/board before felting the bottom edges to either side of the head.


The flower embellishment is made by spiraling a piece of roving into a circle and felting it just behind an ear. Pull strands into the center to form petals. I added a touch of green roving for a small leaf accent.


This lucky critter was given a stylish purple top hat.


Three top tables and coffee tables made for cozy crafting. The bags of roving are from my favorite needle felting supplier Portland Fiber Company, on Congress Street in Portland.


As always my projects are open to adaptation, it was fascinating to observe the creation of this weasel.


One of the participents came late and skipped on the chenille stem step she made an adorable mashed potato pair.


So happy our amazing teen librarian was able to leave the desk and join the fun. I was also surprised to have crafty friends join me all the way from Standish.


We had a rare albino hedgehog sighting and a camera shy multi-colored tie dye hedgie.


Don't stop at just one, they're happier in pairs!

Thursday, August 5, 2010

How To: Mermaid and King Triton Craft


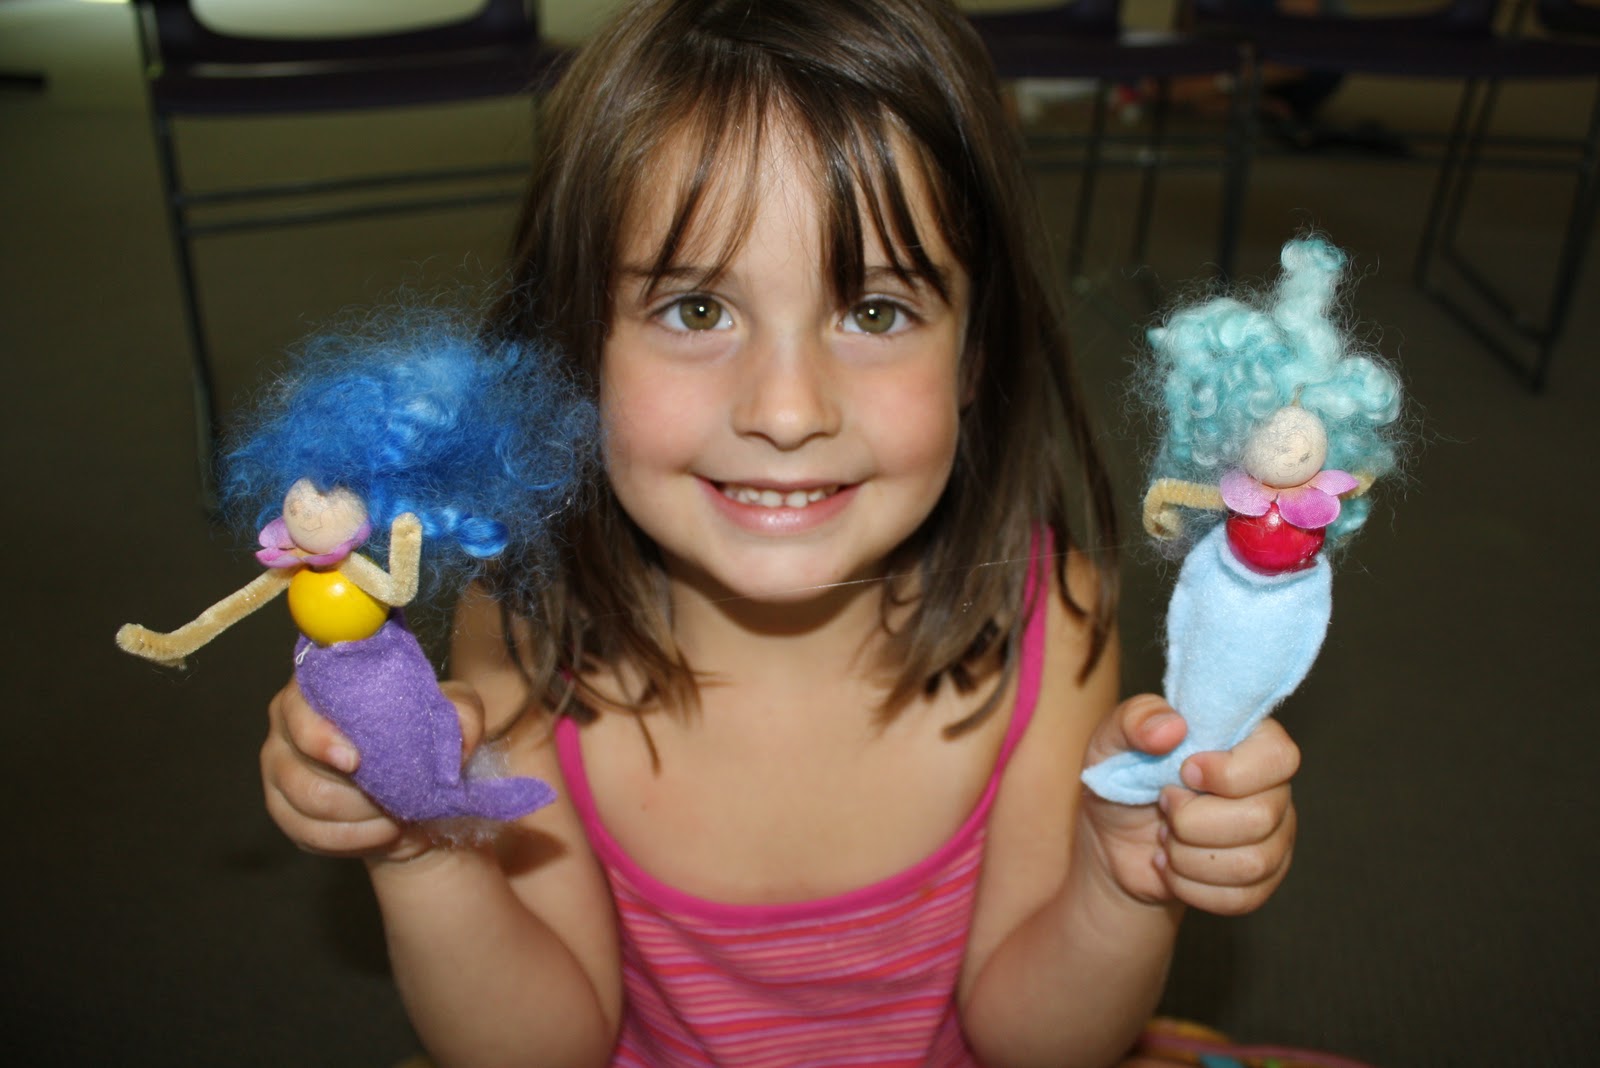
If you spend time with little girls you've already seen first hand how tales of mermaids capture their imagination. This easy mermaid craft project is inspired from the flower fairies I created for my Fairy Crafts book ten years ago. There's nothing like creating magical beings to ignite a child's imagination. I've been eagerly anticipating this workshop all summer long and was excited to share it with my library friends this week. The best surprise was watching how much the boys enjoyed making the Triton variation, arming the merman with a shiny trident was key.


Books are the best way to bring a group together, I began by reading Mermaid Sister by Mary Ann Fraser, it's the perfect read aloud full of fishy humor and entertaining jabs at sibling relationships. It's one of my daughters favorites, I can almost recite it by memory.

Materials:
Wool roving for the hair - Portland Fiber Company
20mm Unfinished round wood bead
20mm and larger Colored wood bead - Darice
Felt - I use National Non Wovens Xoticfelt tm made from Bamboo for my kits
Beige chenille stem cut in half - one half for the body and the other half for the arms
Silver tinsel chenille stem for the trident, and an additional 3" piece section to make a crown.
Small amount of Poly fil stuffing
Colored pencils
Silk flower petals - pulled from small silk flowers for the mermaids collar


Tools:
Wire cutters to cut the chenille stem (to save your scissors)
Hot glue gun and melt sticks
Needle and thread or Sewing machine


To make the merfolk tails you'll need to create a simple paper pattern.  Fold a sheet of paper in half draw half a fish shape 4 1/2" long tail that is 1/2" wide at the waist, 1" at the hips, 1/2" at the connection to the tail and flares out to an 1 1/4" at the tail. Cut along the line so that the paper unfolds doubling the measurements and makes a symmetrical full sized pattern. Use the pattern to cut two felt tail pieces, stitch the outside edges together, be sure to leave the top open for stuffing. For the sake of the workshop the librarians kindly pre-cut all the tails and I pre-stitched them.


The first step is to fold the chenille stem in half and trap a generous pinch of the roving hair in the fold. The mermaids hair falls in two long flowing sections, tuck in the ends of King Triton's hair to make it appear shorter. After you arrange the hair slide the unfinished wood bead head up the chenille stem ends, pushing it snug against the hair.


For the mermaid thread the petal collar over the ends and slide it up against the head bead.


Position the second beige chenille stem for the arms between the the ends and slide it up under the head bead/petal collar. Slide a colored body bead up the ends and push it up against the arms to hold them in place.


Bend the arms at the elbow and fold the ends over to make hands.


Separate the chenille ends under the body bead to create hips that hold the stacked beads and arms in place.


Use a pencil end to help push the Poly fil stuffing into the tail. Leave some empty space at the top of the tail to accommodate the body.


Carefully apply hot glue to the chenille hips and the base of the body bead and carefully pull the tail over the glued areas. This is an adult step, after years of crafting I still manage to burn myself with the glue gun!


Shape the short silver tinsel chenille section into a crown, and the long section into a trident. King Triton also needs a beard, carefully glue a small section of roving to his chin. Use colored pencils to color a face, avoid using felt tipped markers that will bleed into the unfinished wood.


This was my daughters favorite workshop of the summer, get crafty and spread some merfolk fun with your family! I'll be selling these handmade mermaid kits at Higgins Beach Craft Fair next Friday the 13th and Saturday the 14th.
Related Posts with Thumbnails